ZeroFive Antenna Installation
 After receiving all of the parts and getting them in order, it was finally time to do the installation of the ZeroFive 40-10 vertical.
Digging the hole
As a reminder, the first piece done was digging the hole for the cement and the mounting pipe. In the Puget Sound area of the Pacific Northwest, this is no easy task. Puget Sound was formed from glaciers in the last ice age and what is left is mostly small rocks with some dirt around them. Hand digging takes time.
However, I was able to get down almost to the recommended depth and was able to mold the hole into a bit of a bell shape at the bottom so cement would need to come up against earth.
After that came putting the mounting pipe into the ground. I then used levels to get the pipe perfectly vertical. I then used stakes and rope around the pipe to hold the pipe in place to maintain the vertical before pouring in the cement.
After the cement is in place, you wait for it to cure.
Mounting the antenna
Finally, we get to the day where the antenna gets mounted to the mounting pipe.
First, one needs to put the radial plate over the mounting pipe to the ground. After that comes the antenna.
Here's a picture of what each of the 3-foot sections, all perfectly tapered to fit into only the correct aluminum tubing section:
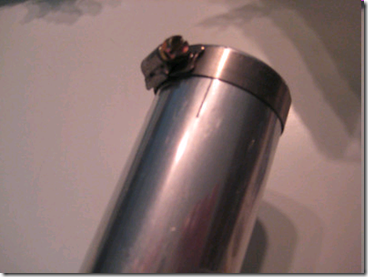
This picture is slightly out of focus. There are two items to notice. First, the tube is slit in three places around the end of the tube to aid in fitting the sections together. Second, the stainless hose clamp used to connect the sections together.
Each section is marked before shipment with a line for fitting to the section so you get the correct length. No need to measure on your part; a great time-saver by ZeroFive.
I put on connectivity goop on each aluminum section; the inside of the tubing shown and the outside of the connecting tubing. I did this for each section.
The top section comes with a black cover for the top section of aluminum tubing. It was not cheap and fit tightly into the tubing. This, of course, to keep rain and snow out of the vertical.
And, from our first article, remember that above the insulator there is also a weep hole drilled into the aluminum tubing for condensation that may build up onside the aluminum tubing. Very smart.
The fold-over mounting plate is then attached to the mounting tube. I then attached one 12-foot section to the mounting plate and then another 12-foot section to that so the entire vertical was connected, but on the ground. The 12-foot sections were easy to carry from inside to the antenna; your situation could be different. Each section of the antenna is 3-feet long so you can connect the length you need to carry around as needed.
Then I slowly walked the entire antenna up so that it was vertical, tightened down the number 8 bolts to secure the antenna.
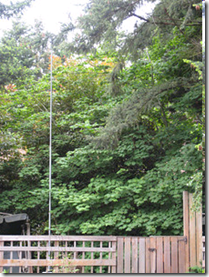
Staring at the antenna
Then I stared at it for a while. Always nice to see an antenna...
After this, I installed the Balun on the ground side of the antenna and connected the center and ground from the Balun to the correct bolts.
Finally, for that day, I connected the coax to the Balun and ran the coax back to the house. Turned on the radio, of course, and heard signals.
Radials were left to two full days to come.
You can see all the pictures at SmugMug, where I have all my photos (still uploading more galleries to this great site from the laptop).
Next up: radials.
Scot, K9JY